Setting up GWT2 project with gwt-maven-plugin
18/Dec 2009
GWT2 offers a lot of exciting new features: OOPHM, SOYC, code splitting, declarative UI, to name a few. This evening, I experimented setting up a GWT2 project using Codehaus’s gwt-maven-plugin.
I’m using Eclipse, so obviously, you need m2eclipse and Google Eclipse Plugin. First step is creating a Maven project:
File->New->Project...->Maven Project
In the archetype selection dialog, select org.codehaus.mojo.gwt-maven-plugin:1.1.

We choose this to create an archetype but 1.1 doesn’t work with GWT2. Later on, we will modify pom.xml to use another version of the plugin.
Enter your project’s GroupId, ArtifactId, Version, and Package -> Finish

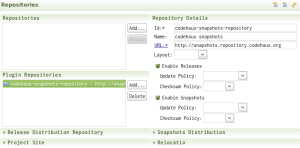
The plugin generates an archetype of GWT 1.6 project. In Eclipse, open pom.xml. As stated earlier, gwt-maven-plugin 1.1 doesn’t work with GWT2. You need 1.2, but since 1.2 hasn’t been released, we will use the snapshot version. The snapshot version is hosted on codehaus’s snapshot repository, so we need to add the repository first.

Id: codehaus-snapshot-repository
Name: (anything you like)
URL: http://snapshots.repository.codehaus.org
Then, change the version of gwt-maven-plugin from 1.1 to 1.2-SNAPSHOT
Also, you need to specify the module and runTarget in the configuration of the plugin, something similar to the following:
        <plugins>
            <plugin>
                <groupId>org.codehaus.mojo</groupId>
                <artifactId>gwt-maven-plugin</artifactId>
                <version>1.2-SNAPSHOT</version>
                <executions>
                    <execution>
                        <goals>
                            <goal>compile</goal>
                        </goals>
                    </execution>
                </executions>
                <configuration>
                    <module>com.mycomp.demo.mygwt2.Application</module>
                    <runTarget>com.mycomp.demo.mygwt2.Application/Application.html</runTarget>
                </configuration>
            </plugin>
  </plugins>
Save the pom. Eclipse will be busy fetching the dependencies and building the project.
After it’s done, it’s time to create launchers.
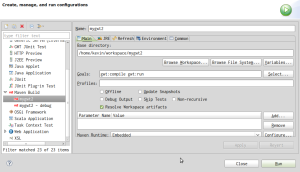
Right click on pom.xml, Run As->Maven Build…, in the Run Configurations dialog, put “gwt:compile gwt:run” as the goals.

Hit “run”, GWT Development Mode application will appear.

The final missing piece is the debug mode. One of the advantages of using GWT is developing AJAX application with existing Java tooling. So let’s go ahead and set it up. Right click on pom.xml->Run As->Maven build… In the following dialog, enter “gwt:debug” as goals, save it.
Click on the dropdown of the debug button on the toolbar, select “Debug Configurations”.
In the left panel, find “Remote Java Application”, select it and click the icon for “New launch configuration” (top left corner). Accept defaults, save, and close.

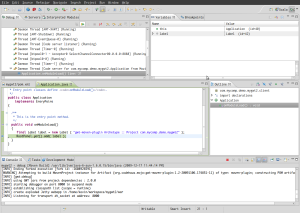
Put a breakpoint at Application.onModuleLoad(), start the debug server by running the debug launcher we just created. (the one with goal gwt:debug). When you see “Listening for transport dt_socket at address: 8000” in the console output, run the attach launcher we just created (the remote debugger). The GWT Development Mode app pops up. Because GWT2 uses OOPHM (Out Of Process Hosted Mode), you need to copy the start URL and paste it in a browser (I’m using FF). If it’s the first time you run hosted mode like that, you will be asked to install a Firefox plugin. After it’s installed, paste the URL into the address bar. If everything goes well, your breakpoint will be hit.

There you have it. A sample mavenized GWT2 project. Enjoy the goodies offered by both GWT2 and Maven!
